Photography Techniques: Portland Penthouse with Views!
I didn't know anything about this building when I came up to shoot one of the condos inside. The lobby and public hallways were unassuming, so imagine my surprise and delight when I opened the door and saw this:

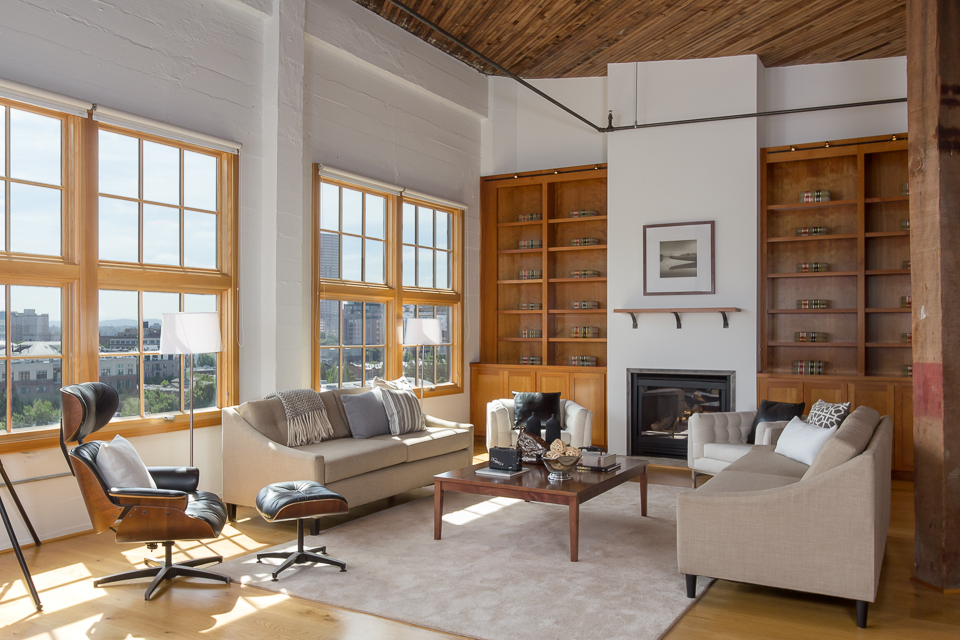
This is a composite of 4 images - 1 ambient interior, 1 with 2 flashes (1 bounced camera left and 1 shoot-through umbrella camera right), 1 with a flash &STU far camera right lighting up the book case, back of couch and wood beam, and finally, 1 to capture the window view.
Yes, this was going to be a fun shoot! Since there are a number of real estate photographers in Portland - mostly shooting HDR - I'll use this shoot to illustrate what is unique about what I do for real estate shoots, and how I am able to achieve magazine quality photos that capture the true light and color of a space without the drawbacks of HDR (grungy shadows, inaccurate colors) and a little bit about why I shoot what I do the way that I do.
The above image is a 9 image composite of multiple flashed layers. I'll go into more detail for images below, but suffice to say that lighting such a large space with only 3 flashes is always a challenge! There's nowhere to hide the lights.

Again - a 4 image composite. 1 ambient, 1 flash layer with a light bounced far camera left to light up the secondary space and a flash with STU camera left aimed at the window to light the table. 2 layers for the window view - 1 with far left windows, 1 with far right windows.
Even though this space has beautiful natural lighting, which made it easier to light, the difficulty with lighting most interior spaces is this: the light outside is usually much brighter than the light inside. In addition, interior lighting (lamps, ceiling lights, pretty much any man-made lighting except daylight balanced bulbs) have a different temperature - in other words, a different color - than natural daylight. This is why your standard interior lighting looks orange colored compared to daylight. What this means is that if you have all of the lights on inside, they change the color of the walls, furniture, and anything else the light falls on. If you color balance so that their color is correct, the light shining in from the window is blue, because in comparison, it IS blue. This is why HDR photos often look a little strange when it comes to color - the photographer is capturing the light that actually is there, but the camera and software do not interpret it the way your eyes do.

Again, 4 image composite. Are you seeing a pattern here? 1 ambient frame, 1 flashed shot with 2 flashes - 1 bounced camera left off a white wall, the other through an STU camera right. 1 flashed shot with slight variation on lighting to remove shadows cast from the lamp in the left of the frame. 1 window pull.
The best way to fix these two issues? ADD LIGHT THAT YOU CAN CONTROL! My flashes are the same color as daylight, and I can not only adjust the power to get more or less light, I can bounce them in various ways to get harder or softer light, AND I can use gels to change the color temperature of the light! This is how commercial and editorial photographers have been shooting for decades to light architecture accurately to portray the fall of light and shadow, as well as the colors, as the architect & interior designer intended.

One of the easiest kitchens to shoot, ever. 2 layer composite - 1 flash with STU camera left with kitchen lights ON. 1, same setup, with kitchen lights OFF! I used the lights off image as the base layer so there is no reflection from the lights on the kitchen counters, then masked in the lights above the island and the under-cabinet lighting to taste.
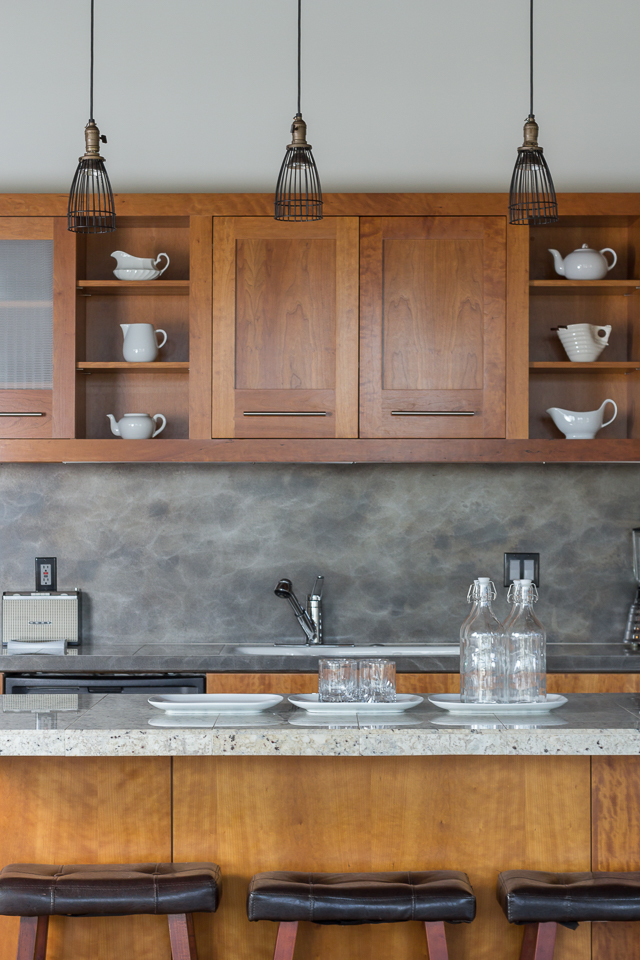
Same lighting setup as above. Kitchen lights off. Used a 50mm lens. 1 shot - not a composite.

4 image composite. 1 ambient, 1 flashed (flashes bounced off white walls camera left and above the bed camera right. 2 different exposures for the view due to variation in lighting outside (due to the different building heights and sun location).

1 shot - not a composite - flash through STU camera left. 50mm lens. Can you imagine sitting in this window seat, sipping on some tea or wine, gazing out on the sparkling nighttime lights of Portland?
I love adding in detail shots whenever possible - if the house is nicely furnished or nicely staged and has unique interior details. I feel that doing this helps create a story of the home, a sense of the space, which sparks a desire for potential buyers to be in the space. In today's media-saturated culture, these are the kind of photos that will really speak to a potential buyer and allow them to envision themselves not just in the space - but living the lifestyle. This kind of photography - that speaks of the product as a lifestyle choice - has been shown to be very effective amongst consumers of all kinds of products. And when it comes down to it - when you are selling a property, you are selling a product. So make sure you portray your product in a way that speaks to your target audience!

1 shot - not a composite - 1 flash camera left through STU

1 shot - not a composite - 1 flash through STU camera left, 50 mm lens
Okay, are you in love with this penthouse yet? It can be yours for only $1,425,000. At 2700 sq ft with an additional 266 sq ft terrace with views, it's not such a bad deal if you consider the location, the quality of interior details, and that the Marshall Wells building is architecturally significant with an interesting history. View more photos here and contact Tina Schafer for a viewing!